

How to spool backing onto a fly reel: method and optimal amount
In this guide, I walk you through three simple techniques to spool backing onto a fly reel and dial in the right amount.
The goal is to leave 2 to 3 mm of space below the spool rim, for smoother line handling and more comfortable retrieving.
Backing also helps reduce fly line memory: by increasing the arbor diameter, the fly line is less "tight" on the spool.
Incorrect fill quickly causes issues: the fly line can bunch up on the spool, it rubs more, and retrieving becomes less efficient. Also note that friction wears the fly line prematurely.
On the other hand, a properly filled spool ensures smoother line payout and faster line pickup.
1. The method with 2 identical spools
The method shown here is simple and reliable. It works with two identical spools and saves you from having to precisely calculate how much backing you need.
You simply eyeball it directly on the spool. The transfer then puts the lines back in the correct order.
Step 1: Spool the fly line onto spool A
- Attach to spool A the front end of the fly line (the end that connects to the leader).
- Wind on the entire fly line.
- This step reserves the exact volume needed for the fly line.
Step 2: Add the backing
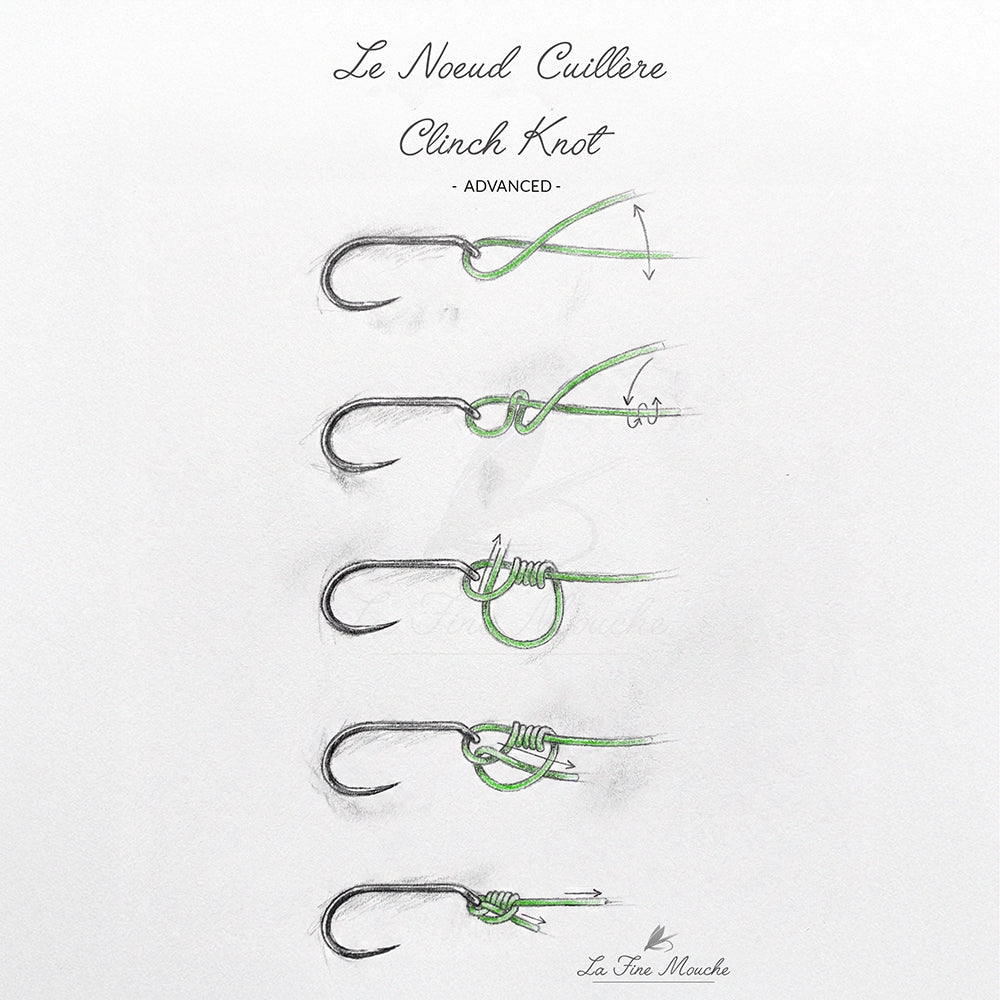
- Tie the backing to the fly line loop with a simple spoon knot.
- Trim the tag end to about 2 mm and lightly melt the tip to secure it.
- Wind the backing onto spool A.
- Stop 2-3 mm from the rim.
Step 3: Transfer to spool B
- Rewind everything from spool A onto spool B.
- Keep steady tension.
- The transfer puts the lines in the correct order.
Final result
- Backing on the bottom
- Fly line on top
- Optimal fill
2. The method with 1 spool only
This method follows the first two steps, but is done with a single spool.
- Spool the fly line, then the backing, as in method 1.
- Strip everything off and lay it out flat on a clean surface, without overlaps.
- Attach the backing directly to the reel.
- Wind everything back on while keeping light tension.
The main challenge is avoiding cross-overs and knots. Work slowly and keep the fly line + backing well organized before the final wind-on.
3. The progressive method with 1 spool only
You can also get a good fill by making progressive adjustments.
Before you start
Use the reel manufacturer's recommendations. They generally indicate the backing length that matches the fly line model. It's a solid baseline, but don't hesitate to add a bit more: it's easier to shorten afterward, and it's cleaner than adding backing later.
Then check visually: there should be 2 to 3 mm of space below the rim.
- Attach the backing to the reel and wind on the recommended length.
- Connect the fly line to the backing
- Wind everything onto the spool.
- Check the fill level, then adjust if needed.
How to adjust?
If it's overfilled, strip off the fly line.
Shorten the backing, tie it back to the fly line, then rewind while keeping light tension. Check again and repeat if needed.
Key takeaway
This method may take one or more attempts, but it remains straightforward and only requires a single spool.